Vine Branch Glass Mosaics Project
"I Am The Vine; you are the branches" John 15:5.For ages 10 to Adult. Close adult supervision is required. Includes easier method for younger kids, see below. Become a yearly support partner to make more Christian resources like this possible. The Vine-Branch mosaic pattern as well as the Cross and Lighthouse patterns (see below) are included in Premium Membership.

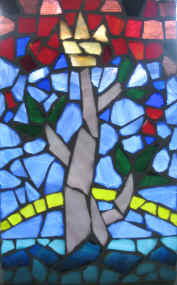
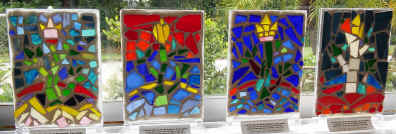
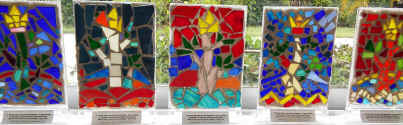
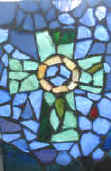
This design was inspired from the stained glass window in the sanctuary of my church. The Vine-branch is topped with a crown, conveying the supremacy and royalty of King Jesus.
What You Need: Vine pattern* (available to Members); Acrylic frame or menu stand (size pattern according to frame - 5" x 7" or 8.5" x 11"); Stained Glass, Adhesive Glass Glue;
Tile Nipper, Pre-mixed white sanded adhesive grout; small plastic putty spreader; large, smooth surface sponge; Q-tips; tape; paper towels; rubbing alcohol. Protective eyewear is recommended when cutting and nipping the glass pieces.
What You Do: Read the directions before beginning. Place the vine pattern between the Plexiglas frame with design facing up.
Main design - This part of the process requires less glass cutting. Use a Q-Tip to apply the glass cement to a small area of any of the positive shapes (the crown, vine, branches, arch, water). Using the pattern as your guide, begin placing the glass pieces onto the glue. The glass pieces should be placed about 1/8 to 1/16 apart. Apply enough glue to bond the glass effectively, but not so much that the glue oozes out.
Background - This part of the process requires cutting/nipping the tiles to fill in the background area; similar to putting a puzzle together. Please use caution and protective eyewear. When nipping and cutting the glass with the tile nippers, cup your hand over the glass to keep it from flying.
Allow to dry for 24 hours.

Remove pattern from Plexiglas. Use a small, flat, plastic putty spreader to apply sanded adhesive grout over the glass. Allow the grout to glide over the
tile, while making sure the grout pushes between the glass pieces. But don't press down hard. Otherwise you might pop off the glass pieces. You will completely cover the design. Carefully scrape away excess grout. Finish the edges and scrape them clean.
Now using an almost dry sponge and keeping it completely flat, begin wiping the grout off the surface. It will be a process of rinsing the sponge, wringing it out to get as much water as possible out of the sponge, and then wiping the grout some more. Continue doing this until the glass is almost clean. It is VERY important that you keep the sponge flat so as not to pull the grout from between the spaces. After much wiping, rinsing, and wringing the sponge dry to the touch, the glass should appear almost clean. A pale haze of grout remaining on the glass is to be expected.
Allow to dry for 24 hours.
Use a soft wash cloth and glass cleaner to buff the glass to a beautiful shine. Place it on a window sill to
let the light shine through.
Copyright 2005/2015 S.A. Keith - All Rights Reserved
SundaySchoolNetwork.com
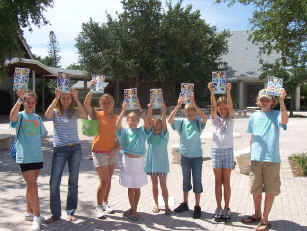
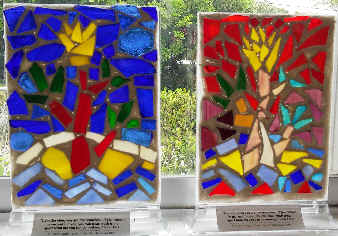
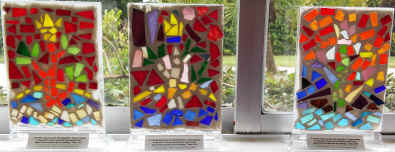
Look how beautifully unique the student's Vine-Branch-Crown mosaics turned out!
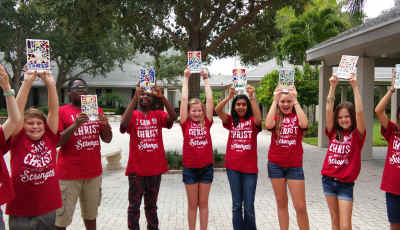
FunArts Camp F.P.C. North Palm Beach,FL
This pattern, and many other resources and discounts are available to our yearly Support Partners. Click here to become our support
partner.
Send your pictures to:
submissions@sundayschoolnetwork.com
To make this craft with younger children, substitute clear overhead projector sheets for the Plexiglas, colored tissue paper for the glass pieces, and Modge-Podge for the glass cement. Copy the design onto an overhead sheet. Apply the Modge-Podge and the tissue paper over the design.
When you become a Support Partner, you'll receive the Celtic cross pattern. The circle in the cross represents eternity or God's eternal love. You will also
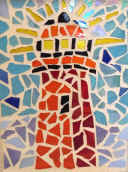
receive the Lighthouse pattern, which coordinates well with our Lighthouse Bible
lessons, an overview of the book of Acts.

Click here to become our support
partner.
You can make a
difference!
Your purchases
and donations to the site help to distribute
our children's ministry resources to churches across the world.
Subscribe to our Newsletter - Learn More
Return to the Christian Crafts section.